Gaming

Home Gaming Page 110

Hollow Knight: Silksong: How To Beat The Father of the Flame

0
Hollow Knight: Silksong: How To Beat The Father of the Flame


As someone who played and adored Demon’s Souls many moons ago, I’ve had a long fascination and appreciation for a gimmick boss fight. So, to learn that Silksong has its fair share of gimmick boss fights where the gimmicks are almost always fun was a real boon as I explored Pharloom.

There are some great gimmick fights, but the one that really resonated with me was The Father of the Flame, the resident boss of the Wisp Thicket.

You see, if I can get away with it, I approach just about every boss imaginable as a pogo boss. So, to find that this boss was a bona fide pogo boss was incredible. However, I understand that it plays into my skillset, and if you aren’t a confident pogo player, you may find this fight extremely difficult.

So, I’ll put my pro pogo skills to good use and guide you through this fight as best I can. This boss is lit, but if you can consistently pogo, they won’t be for long.

Where Is The Father of the Flame?

The Father of the Flame is a boss found in an optional area of the map called Wisp Thicket. An area filled with deadly enemies that can cast exploding fireballs at you, making Patches O’Houlihan’s five ‘D’s of dodgeball pertinent here.

To access Wisp Thicket, you need to have access to the Faydown Cloak, as this is needed to access the pathway up through the towers in Greymoor to reach this area above.

Once you’re up in Wisp Thicket, head left from the starting point. However, before doing so, enter the room on the right and use your needle to strike the hanging bags overhead. This will release a bench where you can rest to reduce the runback.

There is some platforming required to get to the boss, but you can use your Clawline to avoid most of the enemies along the path if you so choose, as there is no way to heal consistently during the Father of the Flame fight, so every mask counts.

Then, when you reach an area of the map marked with Bellhart colors, then you’ll be moments away from one of the most unique boss fights this game has to offer.

How to Prepare For Father of the Flame

Setup for Father of the Flame

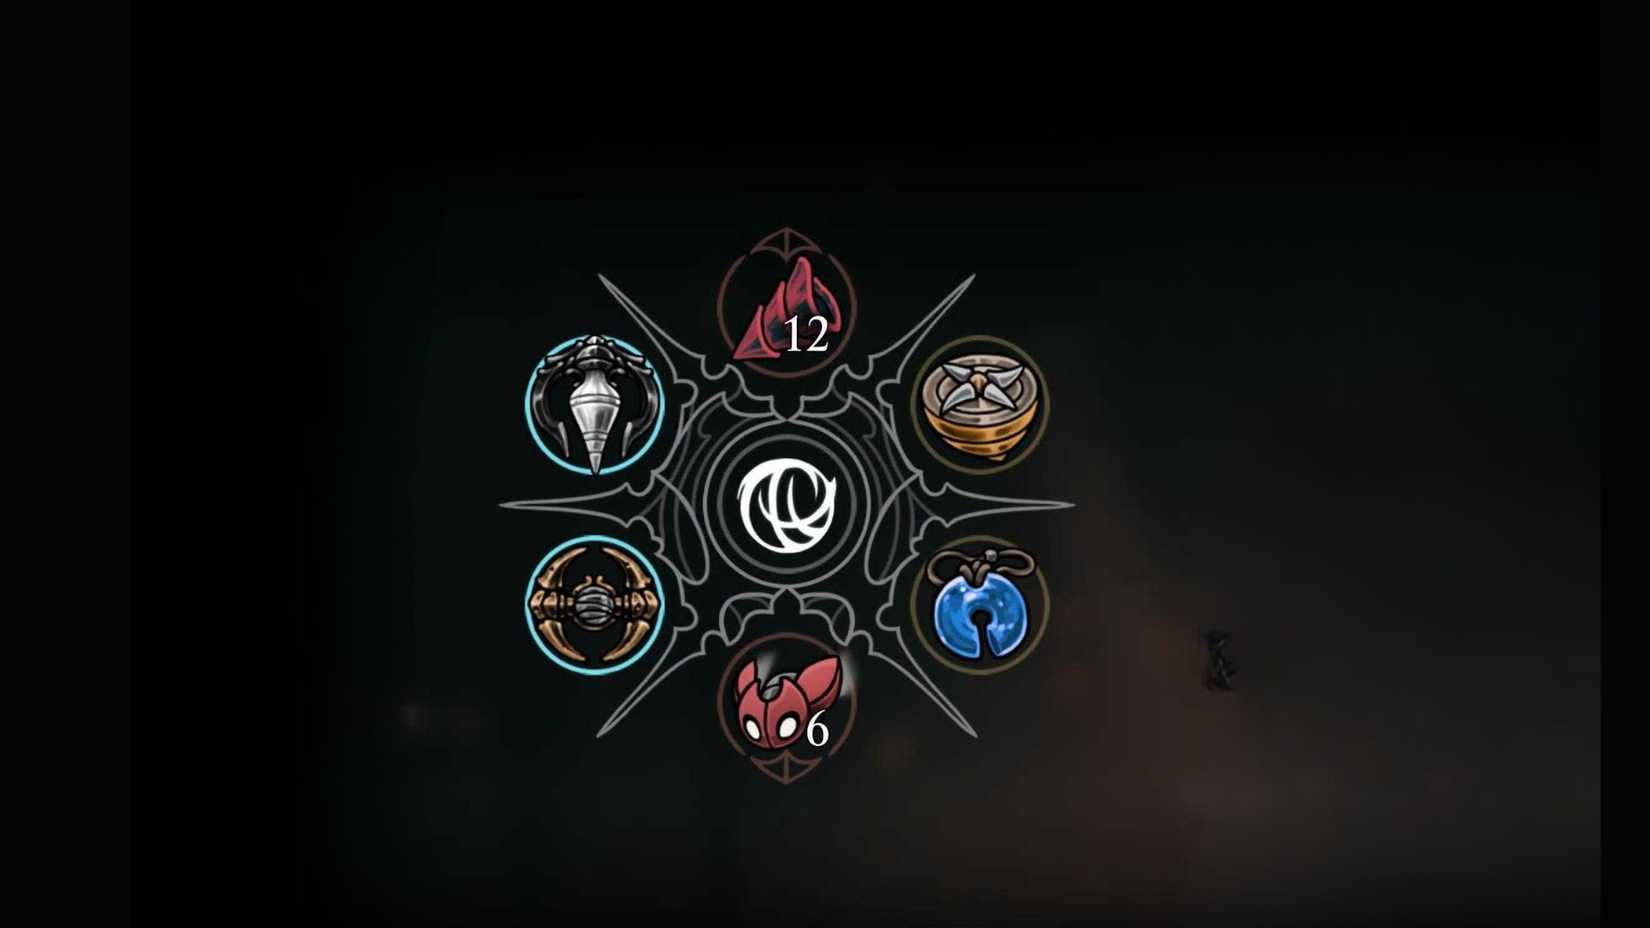
Seeing as Father of the Flame is such a unique proposition in Silksong, it requires a rather specific approach. Here is the build that I would suggest to make short work of this boss fight:

Firstly, the Crest of the Reaper, at least in my humble opinion, is super important for this fight, as this is the most consistent pogo crest the game has to offer, making things a lot easier when it comes to chaining pogo attacks consistently.

Second, when selecting your weapon tools (red), I would suggest you pick weapons that don’t require you to aim or time your attack, as it’s not realistic in this fight. Cogfly is a superb option, and Conchcutter is a great one as well, provided you can make it through the Sands of Karak to claim it.

For blue tools, I would suggest the Multibinder and the Reserve Bind, as there is no way to gain additional silk during this fight. So, having a spare heal as a safety net and the ability to gain more masks back from your heal is vital.

Then, lastly, because there really isn’t any better choice, I would suggest the Magnetite Dice to see if you can luck out and avoid taking damage once or twice during this fight. But really, your yellow tools don’t really matter in this encounter.

How To Beat The Father Of The Flame
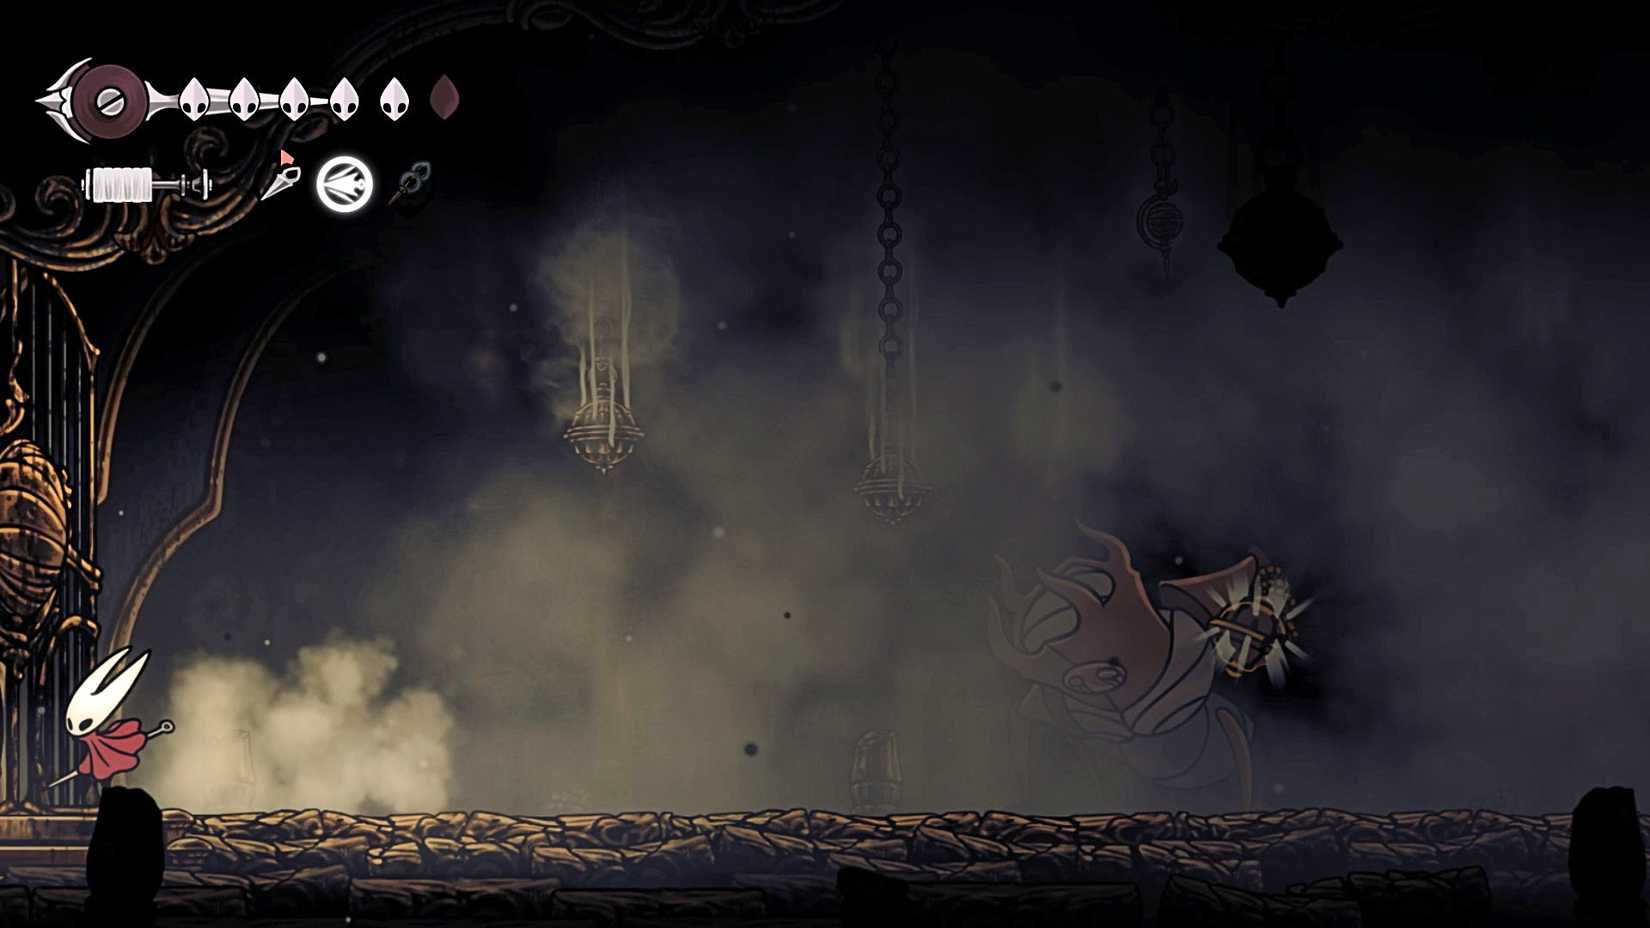
Phase One

So, as you might have gathered, the Father of the Flame doesn’t behave like a normal boss. Instead of being one single target to hit and avoid, this boss has five lanterns serving as their weak points, and they are dotted around the arena, forcing the player to platform and pogo to consistently hit them.

However, it’s not as simple as just getting to these weak points, as you’ll also have to contend with explosive wisps that track your position.

Based on a player who has upgraded their nail twice by this point, you will need to strike each lantern eight times to clear them, and I have a few tips that can help you navigate this first phase.

Firstly, I would suggest trying to focus on the higher lanterns on screen as they are the toughest to deal with. However, once they are dealt with, the lower ones are much easier to clear, as you can always drop to the floor and hop back up if you’re in danger of taking a hit.

Second, your double jump is your best friend in this fight, as you gain a double jump charge back with every successful pogo. So, when a wisp locks on your position, it’s best to try and time your pogo to help you get some air, and then time your double jump to near-miss this attack and get back to attacking the lantern without missing a beat. It takes some practice, but not panicking and bailing when a wisp comes at you is key to getting through this fight.

Then, thirdly, I would suggest that players don’t get too hung up on attacking one specific lantern. It’s best to be adaptive, as you may find yourself in a situation where Wisps have you cornered if you stay in one spot for too long.

So, if you sense some danger in your current position, drop low and take out some of the low-hanging lanterns instead. Deal with all the lanterns, and this will begin the second phase.

Phase Two

When all the lanterns are gone, you now have a clear shot at the Father of the Flame’s core. This section will start with the boss casting a stream of fireballs, so I suggest dropping to the floor and moving carefully to try to occupy the space between these fireballs.

When this stops, this will give you a window to hop up to the boss and attack the core. They will still spawn Wisps regularly, so be wary of their position and use your double jump to evade them, allowing you to stay on the offensive.

But be wary, they will begin this fireball attack after a few Wisps have left the field again, so keep an eye out for this and drop to the ground when they begin this attack again, because in the air, you’re a sitting duck.

Then lastly, when the battle ends, stand clear of their last explosion, because if you do get caught up in that, you might die and need to fight the thing all over again. But, provided you get some distance, you’ll have beaten the Father of the Flame and earned your reward.

Reward For Defeating The Father of the Flame

Wispfire Lantern Silksong

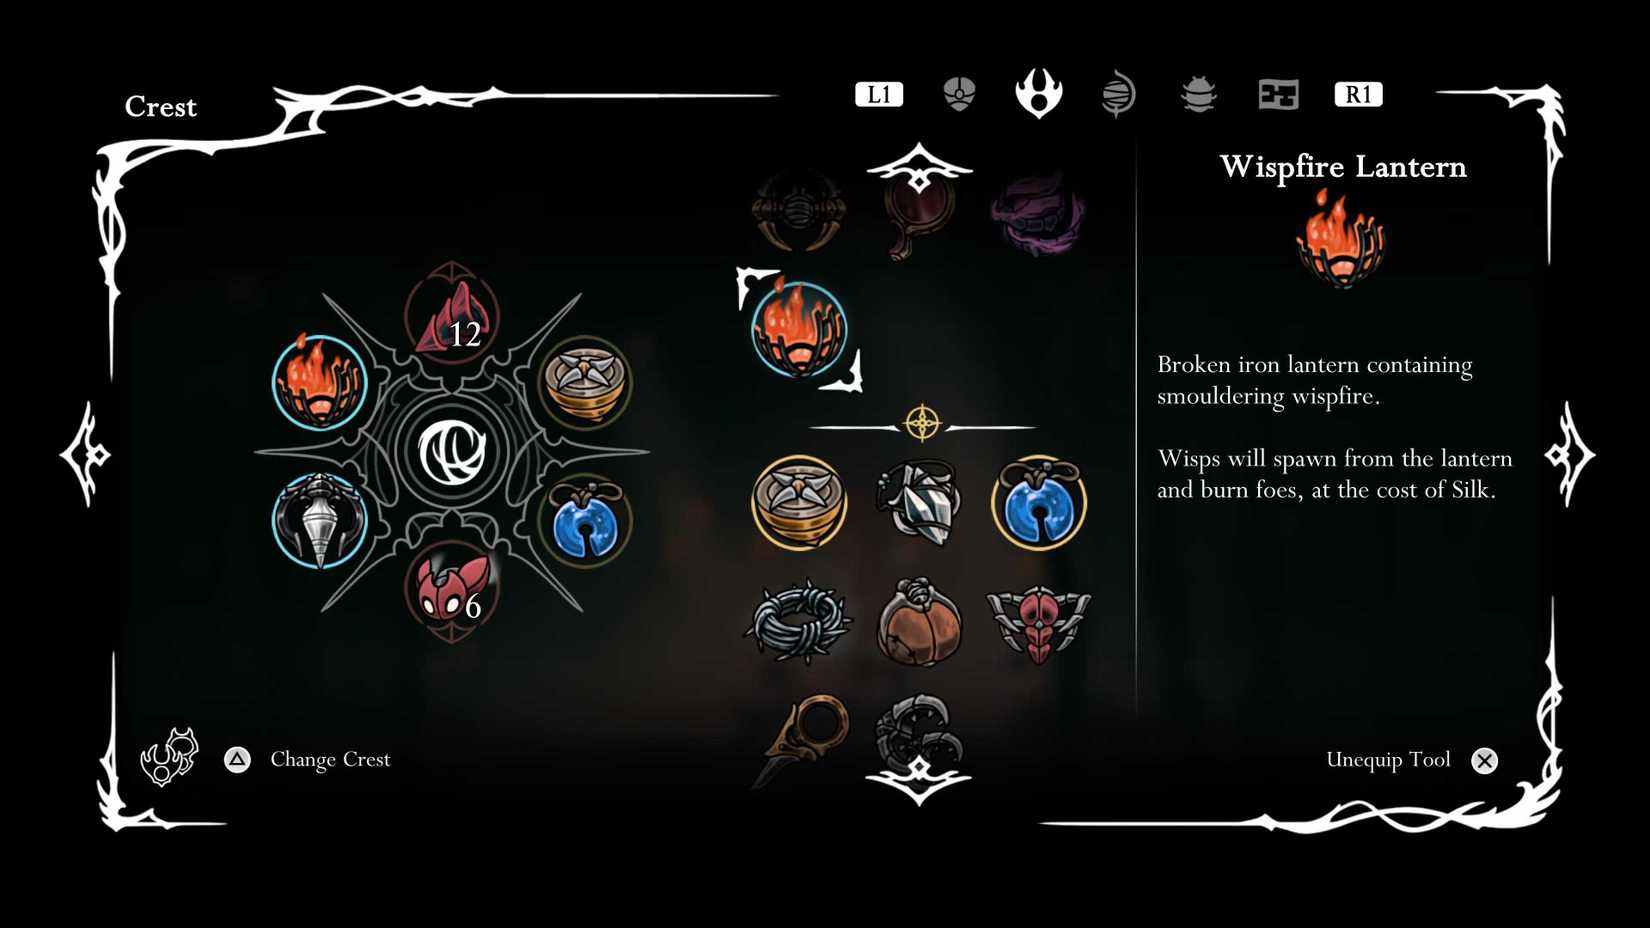
Upon defeating this fiery customer, you’ll be able to pick up a dropped item known as the Wispfire Lantern. A passive tool that makes use of your silk to provide an offensive edge.

Provided you have the silk, this tool will automatically summon a wisp, which acts as a homing missile, initiating an attack on any nearby enemies. Which, as you might have gathered, has its perks and pitfalls.

This tool makes healing a much less consistent option for you, as your silk will be consistently used to spawn offensive projectiles. However, this can be leaned into if the player is keen on relying on more offensive crests and tools.

If you’re someone who relies on silk buildup for consistent healing, I would give this a miss. But if you like to go in all guns blazing, this one burns brighter than most.

mixcollage-06-dec-2024-09-43-pm-7557.jpg

Released

September 4, 2025

ESRB

E10+ For Everyone 10+ // Fantasy Violence, Mild Blood

Developer(s)

Team Cherry

Publisher(s)

Team Cherry

Engine

Unity

Franchise

Hollow Knight

Number of Players

Single-player


Source link

A Decade Ago, The Taken King Saved Destiny–And Then Cursed It

0
A Decade Ago, The Taken King Saved Destiny–And Then Cursed It


Destiny: The Taken King is celebrating its 10-year anniversary today, September 15, 2025. Below, we look back at how it came to represent the years of Destiny, and live-service games more broadly, that would follow.

Ten years ago, Bungie performed a miracle. It also, unfortunately, invoked a curse.

In 2014, the studio renowned for the Halo franchise launched Destiny, which promised to blend its penchant for dynamic single-player campaigns and kinetic multiplayer gameplay with the framework and community-oriented features of MMOs. And while the game was released to an excited and impressionable audience, it floundered. Its opening salvo felt limp and incomplete–a sentiment that later reporting would confirm–but it maintained a playerbase through a spate of smaller middling DLC releases leading up to The Taken King, Destiny’s first major expansion and saving grace.

The Taken King launched on September 15, 2015 and–I say this without exaggeration–revolutionized the game, which felt aimless till its arrival. Destiny’s worlds, while large and beautiful, felt quiet and devoid of life. Its cast felt more like disparate archetypes thrown in a blender than a cohesive company. And its paper-thin plot…well, it was just that. Destiny wasn’t without merit–it excelled in gunplay, boasted an art style that blended sci-fi and fantasy seamlessly, and the level design of its strikes and raids were still exemplary–but all of that felt pointed at nothing in particular. The Taken King whipped it into shape.

From its opening mission through to the riotous end of its raid, The Taken King was sharp in a way the initial release of Destiny could only ever dream of. For 10 years now, I’ve been struck by the construction of the expansion’s first level, where the player must mount a defense of a besieged base on Phobos, and how much livelier it felt than anything Destiny had done in the year prior. Small touches, like an enemy ship cresting over a hill and shining its spotlight on the player, as well as the sights and sounds of explosions in the distance, finally broke up the almost glacial front that permeated Destiny’s destinations. It was like throwing a rock into still water.

Destiny: The Taken King – Intro Cinematic

Want us to remember this setting for all your devices?

Sign up or Sign in now!

Please use a html5 video capable browser to watch videos.

This video has an invalid file format.

Sorry, but you can’t access this content!

Please enter your date of birth to view this video

JanuaryFebruaryMarchAprilMayJuneJulyAugustSeptemberOctoberNovemberDecember12345678910111213141516171819202122232425262728293031Year202520242023202220212020201920182017201620152014201320122011201020092008200720062005200420032002200120001999199819971996199519941993199219911990198919881987198619851984198319821981198019791978197719761975197419731972197119701969196819671966196519641963196219611960195919581957195619551954195319521951195019491948194719461945194419431942194119401939193819371936193519341933193219311930192919281927192619251924192319221921192019191918191719161915191419131912191119101909190819071906190519041903190219011900

By clicking ‘enter’, you agree to GameSpot’s Terms of Use and Privacy Policy

enter

The Taken King finally provided a worthy and meaningful antagonist in Oryx, whose impact and brood still have ramifications on the world of Destiny to this day. It breathed life into characters that could’ve fallen by the wayside, like Eris Morn. It provided a bounty of secrets nestled in the crevices of the Dreadnaught. Hell, it even gave players a quest log! It cannot be overstated how amorphous Destiny felt before The Taken King’s arrival, and how wonderful it felt to bask in it for the weeks and months to come. It hadn’t just come to life, but become even larger in scope. At last, I felt like I was taking part in the epic struggle between light and darkness that Destiny had been billed as while I flitted through the cosmos and used my spectacular powers and weaponry to live out the adventures of my dreams.

For all intents and purposes, Destiny had mounted the comeback it needed. With some narrative direction and goodwill on its side, it had enough gas to continue its ascent. So what curse could I possibly have been referring to earlier?

The unfortunate problem with Destiny is that it never stopped needing saving. If you’re at all familiar with the arc of the series, you may be tangentially aware of the bumpy road the games, as well as the company behind it, have been on ever since. For every high–every Taken King or Forsaken, which came at a similar time in Destiny 2’s lifetime–there have been some standout lows. Unfortunately, while Destiny’s history is marked by a long line of comebacks, it’s just as stained by these immense valleys, brought on often by frequent retooling and reinvention that steadily eroded any ground which could provide it stable footing. And even though Destiny had proven, much like Rainbow Six Siege and No Man’s Sky, that a live-service game could bounce back, it also stood as proof positive of how volatile ongoing games could be. It has typified the often harsh ebb and flow of the model.

You see, Destiny never really enjoyed a sense of stability. While Bungie devised a way forward for its ambitious series, the games suffered content droughts that turned its community against the game at several points in its lengthy lifetime. To solve this problem, Bungie figured out a cadence and template for content drops, like expansions, title updates, and seasonal events, that would supplement the community and feed the machine.

We often talk about the live-service treadmill from the perspective of the consumer, which is always a helpful viewpoint to contextualize its impact and potential harm. But what often feels under-discussed is the effect that this work has on the people who make the content for these never-ending games. And while some titles, like Epic Games’ Fortnite, seemingly have the capital to throw armies at the thing, the same isn’t true of every team.

The cadence of releases under the Destiny banner have seemed increasingly exhaustive on the workforce producing it, especially when factoring in the constant expectations for the next additions to the game to be bigger and better. The live-service treadmill isn’t the only thing killing Destiny though. Paired with the mismanagement of the studio under previous leadership, a toxic workplace culture, as well as constant layoffs and reinventions–some better than others–it’s no surprise that Destiny’s lineage is riddled with instability.

Sometimes that cadence of releases meant that game-changing updates like The Taken King would shake things up for the better. But just as often, it meant that the realities of developing such a big expansion for Destiny caught up with the team behind it. Things fell short. Other expansions like Rise of Iron or Beyond Light felt half-baked, even if they were well-intentioned. Seasons, which were introduced in Destiny 2, felt like a bit of triage that allayed many storytelling and content woes but opened up another can of worms entirely over the years due to repetitive tasks and the removal of seasonal content. Some system-level changes, like reworks to classes, were welcome while others, like the introduction of the Portal, were not. The gulf between Destiny releases has often left a lot to be desired and it has meant that for every two steps that Destiny appeared to take, it would constantly take one back.

Destiny: The Taken King

Where does The Taken King fall into this, exactly? Well, it arguably set the bar pretty high for what Destiny releases should be, and though Bungie has lived up to that promise a few times over the 10-plus years it’s worked on the series, these ambitions have made for just as many misses as there have been hits.

It established an unfortunate rhythm of Bungie amending its errors, showing unprecedented strength, and then showing how that hubris could just as easily be the studio’s undoing. Like clockwork, Bungie has spent the last decade and change stepping on rakes and bouncing back better than ever only to further upset the balance of things in Destiny and inadvertently step on another five rakes, which only landed there by the studio’s own actions.

It’s unfair to place the blame for Destiny’s unevenness on one its earliest and best expansions. It would be a mischaracterization of the DLC and the intent behind it. The Taken King isn’t a stain on Destiny’s legacy because it’s too good. That’s a ridiculous thing to propose. But it certainly did set the game and the team behind it on a trajectory that has, at the very least, proved untenable for the studio and the health of the game in the long term.

So for all the good that Taken King did Destiny by saving it back then, it’s hard to deny that it has made for a tough act to follow, and chasing it after its highs has indelibly marked the studio. It is simultaneously emblematic of the best Destiny would offer, and the lows it would constantly have to recover from.


Source link

How to defeat the Last Judge in Hollow Knight: Silksong

0
How to defeat the Last Judge in Hollow Knight: Silksong


Hollow Knight: Silksong’s Last Judge boss battle is the capstone challenge of Act 1 and one of the game’s toughest fights to that point, assuming you’re following the traditional Silksong walkthrough. That’s not even taking into account the lengthy runback that takes you through one of the Blasted Steps’ more difficult obstacle courses, too.

Our Silksong Last Judge guide breaks down how to handle the runback, lists the Last Judge’s moves and counters, and offers some advice on how best to prep ahead of the fight. We also explain how to skip The Last Judge by taking the Sinner’s Road route. If you’re not sure where that region is, head over to our Silksong interactive map to get your bearings.

Last Judge location in Hollow Knight: Silksong

Image: Team Cherry via Polygon

The Last Judge is at the Blasted Steps’ eastern end, just outside the Grand Gate, and it’s impossible to miss them since the in-game map marks their location with a main quest objective icon. Unless you take the alternate route to the Citadel (which we’ll discuss later), there’s only one way to approach Last Judge — ascend the Blasted Steps. At the top, head left and activate the Bellway and bench in the next room. This will be your runback point.

The Last Judge runback is one of the most challenging in Silksong up to this point. It takes you across several stretches of sand filled with sandcarvers, narrow locations with conchflies whose projectiles richochet off the floors and ceilings, and open spaces where judges wait to bash you on the head. Your first instinct might be to rush through and reach the boss. Don’t. It’s much easier in the long run if you complete the runback several times to get the feel of it and learn how to make it through faster.

It’s possible to clear the entire room and reach the Last Judge without fighting a single enemy. Dash and jump off the platform where the first conchfly appears before it launches an attack. The judge on the platform above you is inessential, since you get nothing but some rosary beads for defeating them, so ignore them and glide to the platform on your right. Pogo across the bells — if you’re using the Hunter’s Crest, activate the Drifter’s Cloak after bouncing off the bell to give yourself some space to control your momentum for the next diagonal bounce.

Use Cling Grip to climb the wall, and ignore the conchfly that pops out from above you. Pogo off the judge’s head to get behind them without having to fight, then do a dashing jump to reach the next platform. Pogo off the bell — or off the conchfly first, if you have to — and then the next platform is free of enemies and obstacles. There’s another pogo challenge on the other side, but you can glide over it and then, at the last minute, dash to reach the wall and climb up it. If you’re not comfortable with that, glide to the last bell, then bounce off it to reach the wall.

The last stretch is free of enemies. The judge is just a husk, and you can pogo off the bells, cling to the wall, then pogo off the higher bells to reach the area’s end.

If that no-combat method doesn’t work for you, just know that you can, at least, skip the judges in this room, which also cuts down on the time it takes to reach the Last Judge again.

Last Judge’s moveset

The Last Judge fight has two phases, and the Judge’s moves change during the fight’s second portion. The way they’re telegraphed remains mostly the same, but the moves have different effects that require different evasion tactics.

First phase moves

Last Judge has three moves in this first phase. Learning the animations that signal which move they’re about to use is essential, as recognizing the difference between the Judge hoisting the censer (the bell-shaped, incense-burning thing the boss carries) to spin it or pulling it back to throw is much more important for your evasion strategy than it sounds. However, being patient is just as important. This is a fight you’ll win by being careful and judicious in your attacks — not by rushing in and trying to deal as much damage as possible.

Leaping smash: Last Judge jumps into the air and slams their censer on the ground. While the move’s range is limited in this first phase, the safest way to dodge this is by dashing under them to the other side. For example, if they’re on your left when they jump, dash to the left to avoid getting caught by the slam. The second or two after Last Judge lands is the best window of opportunity to attack, and you can get in two or three hits before they wind up for another attack.

Censer swing: Last Judge holds the censer up and spins it, then whirls it in a wide circle that catches you if you get too close. When you see the initial spin, dash away to safety. If the Judge uses this move when you’re near the edge of the arena, it’s basically impossible to escape in time, so try staying away from the walls as often as possible. The tell that this isn’t going to be the censer throw move is that Last Judge’s other hand is pointing upward.

Censer throw: Last Judge pulls their hand back and tosses the censer bell out. It damages you if it hits you, but also if it touches you when the Judge pulls it back in. Dash beyond its reach to avoid it, and if you’re at the edge of the arena, use wall cling to climb out of its reach. You can tell this won’t be the censer swing move by noticing the Last Judge’s other hand is facing inward.

It’s possible to dash in and attack right after Last Judge finishes either censer attack, though you need to pay careful attention to what they’re doing with their hands so you can evade whatever attack is coming next. If you do attack, just go in for one hit before retreating.

Second phase moves

After you land enough hits on Last Judge, they let out a roar, add fire to their existing skills, and use a new attack. The phase kicks off with the censer swing’s new variation, and from then on, Last Judge uses a mix of fire-infused attacks and, occasionally, some of the first phase’s moves. Like with the first phase, your best bet is to take it slow, and learn to recognize which move Last Judge is going to use based on the animations that precede the attack.

Holy smokes: Last Judge swings the censer in a wide circle and creates rings of fire that fan out across the arena. Lines of smoke mark where the fire will appear before it ignites, so make sure you’re standing in a safe spot. The fire moves slowly before it dissipates, which means you’ll need to move with the safe space to avoid taking damage. The animation is the same as the censer swing move from the first phase.

Flame charge: Last Judge crouches, then charges across the arena and causes pillars of fire to erupt behind them. Jump to avoid the charge attack, and try to land in a space between the pillars. Smoke will show where they’re going to erupt before the fire actually appears, so you have about a second to move to safety. If you’re feeling brave, you can aim to land between the Judge and the first pillar, which gives you a chance to land some hits. Alternatively, if you land on the other side of the Judge, you can avoid the pillars entirely and just attack until the boss moves again.

Flaming smash: Last Judge leaps into the air and slams down, the same as in the first phase. This time, however, they create a wave of flame that rushes outward from the impact site and covers the entire ground. Dodge the initial slam as usual, then jump and use the Drifter’s Cloak hover to avoid the flame. Use the moment after landing to attack Last Judge.

Flaming censer throw: Last Judge ignites their censer, then throws it, the same as in the first phase. The censer creates a small explosion a second after landing, so remain a few steps away to keep from taking damage.

After dealing enough damage during the second phase, Last Judge roars again and whirls the flaming censer for much longer, sending out three waves of fire rings. This is the only time in our experience that they have done this, however, and it’s not the start of a third phase.

The Last Judge preparing to explode upon defeat in Silksong

Image: Team Cherry via Polygon

After you land the final hit on Last Judge, they start shaking and muttering while a cloud of smoke emanates from them. Move beyond the smoke as quickly as possible, as the Last Judge will explode violently after a few seconds.

How to prep for Last Judge

Hornet standing next to Zylotol the alchemist in Silksong

Image: Team Cherry via Polygon

Timing and patience might be the most important part of making it through the Last Judge fight, but there are other things you can do to give yourself a better chance. One of them is using the right crest. We recommend the enhanced Hunter’s Crest or the Reaper’s Crest for this fight.

You can enhance the Hunter’s Crest by using the Needolin in Moss Grotto to unlock the Weaver door and access Weavenest Alta. The enhanced version lets you deal extra damage after you strike a foe enough times, which lets you whittle down the Last Judge just a bit faster. The Reaper’s Crest is your reward for clearing the Reaper’s Chapel in Greymoor, just above the arena where you fight Moorwing. This crest generates additional silk orbs after you heal, which is handy for maintaining a steady flow of healing or silk skills during the fight.

If you’re struggling with the Last Judge runback’s pogo challenges, stick to the Reaper’s Crest. Its downward strike makes it easier to bounce over the sands.

Your offensive tool choice doesn’t matter terribly for this fight, though if you do use tools, make sure they cover a fair distance and have multiple uses. The Straight Pin and Longpin are the easiest ones to use without putting yourself in danger, though make sure you don’t use them when Last Judge is throwing the censer around, as it blocks incoming attacks.

We also recommend completing “The Alchemist’s Wish” in the Wormways region, which rewards you with the Plasmium Phial. This red tool lets you inject Hornet with plasmium three times, with each injection granting her a temporary mask. If you have six masks already — which we recommend you do before this fight, though it’s not essential — the most efficient way to use the phial is to use one injection while at full health, so Hornet has seven masks. Almost all the Last Judge’s attacks deal two masks of damage, so it’d take four hits to defeat Hornet this way, instead of three.

For blue tools, you’ll want to equip the Magma Bell, which you can purchase from the Forge Daughter in Deep Docks, to reduce Last Judge’s fire damage. Evading is preferable, but at least this way, you won’t take as much damage if you make a mistake.

Finally, it’s a good idea to record footage of your Last Judge runs if you can. The option to learn the boss’ attacks without trying to not be killed by them makes things much easier.

How to skip the Last Judge

If all of this is just too much, you can still enter the Citadel by taking another route, though it’s not an easy route. The path takes you through Sinner’s Road, The Mist, and the Exhaust Organ. This path takes you through plenty of obstacles, including a stretch of fog you have to use the Needolin to get through, and makes you defeat another boss, Phantom. Despite being challenging, Phantom isn’t quite as overwhelming as Last Judge. After you defeat Phantom, head up the elevator into the Underworks and continue along the path to enter the Grand Bellway Station in the Choral Chamber.

If you do take either path into the Citadel, Last Judge will still be at the end of the Blasted Steps region for you to challenge later.

Last Judge rewards

If you count satisfaction for defeating a tough boss as a reward, you get that. If not, the only thing Silksong gives you for this fight is an achievement (Judge) and unfettered access to the Citadel.

Looking for more Silksong help? Check out our essential beginner tips and top rosary bead farming locations if you’re just getting started, and if you’re running up against a few locked doors, our simple key locations guide is the one for you.

While you’re exploring and completing quests like the “Rite of the Pollip” wish or “Silver Bells” request, make sure to spend some time progressing the main story as well, as you’ll get some upgrades that make battles easier. After “The Threadspun Town” quest, for instance, you can upgrade your needle to deal more damage.


Source link

Wings of Seduction Steam Review

0
Wings of Seduction Steam Review


Warning: This is an explicit naughty game. Wings of Seduction is very NSFW!

Imagine, if you will, a cross between Valkyrie Squad and Waifu DIscovered. Wings of Seduction: Bust ’em Out is a naughty bullet hell auto-shooter where you blow women’s clothes off, then have sex with them. There is a story here that doesn’t make a lot of sense and is frankly irrelevant. What you need to know is that there are 5 lovely waifus with several difficulty levels each. You can even purchase an alternate outfit for them. There are 2 H-scenes for each waifu, the standard one, and an unlockable second one. Frankly, the clothes destroying isn’t great because the screen will be filled with so many enemies and bullets, you’re not going to be seeing much. And the H scenes are short and kind of boring. So enough about Wings of Seduction’s naughty aspect, on to the game play!

You blow her glasses off, and now she can’t see!

Wings of Seduction’s Game Play

The game is an auto-shooter, you fly around and the weapons fire themselves. You have a dash, and an Annihilator weapon, plus three standard weapons. Enemies drop exp. Elite enemies drop weapon customization options, like adding a burn proc or healing per hit(more on this in a bit). The exp is used to level up your weapons and passive skills. The weapons have three levels, and can be further upgraded to one of three different options(the third is unlocked once you max the other two). EXP is also used to unlock points which you destroy pieces of the waifu’s clothes. Destroy those, and a frenzy circle appears, stay in it for about a minute and all of a particular clothing item will destroyed. Once she is fully naked, the giant bosses appears. Beat the boss, you get a cut scene, and the H-scene.

Wings of Seduction
all of that will be gone.

The beauty of Wings of Seduction is the customization options, more so than in any other auto-shooter I have played. You can choose your starting weapon among any of the standard weapons, and choose the weapon’s evolution. There a three annihilator weapons to choose from. Then you get to customize the weapons themselves, which can really help further their effectiveness. You also get talents that are unlocked, like starting with 3 passive skills. There is also the standard research function of unlocking permanent bonuses. You can also customize the waifus with the extra outfit if you don’t like the standard one!

Conclusion

Do not buy Wings of Seduction for the naughty stuff. As you can see in the screenshots, the ladies are dimmed out so you can focus on the action. The sex is done better elsewhere. Plus you can turn all the naughty off if you want. What you do buy this for is the great game play. With lots of difficulty levels per waifu, you’ll be at the for a while. I give this a Must Play with a nine score. It’s one of the better auto-shooters out there and can pack a punch. Don’t let the hentai coating fool you, like Mokoko X, there is an actual game here, and quite a good one at that.

Overall: Wings of Seduction: Bust ‘Em Out is an auto-shooter with a hentai coating, but the game play far outshines the naughty bits. Definitely worth a play!

Verdict: Must Play

Score: 9

Steam Page

Release Date8/19/24Cost$12.99Developer/PublisherRamanCat Games

Subscribe so you never miss a review!


Source link

The Knightling Review – Small Hero, Big Shield, Mixed Results

0
The Knightling Review – Small Hero, Big Shield, Mixed Results


The Knightling wants to be a heart-warming indie game about an apprentice stepping out of his master’s shadow while also being a throwback action-platformer where you bash monsters with a giant talking shield. It mostly succeeds thanks to its charm and platforming, even if its combat and pacing can’t quite keep up.

Our main character is the knightling to the legendary hero Sir Lionstone, who is famed for defeating a powerful Earthborne and claiming its magic sword and shield. Since that fateful day, Lionstone has become the defender of the realm, the person you go to when you need a monster slain or a problem solved, or possibly a problem slain and a monster solved.

Review code provided by the publisher

Unfortunately for our little knight-in-training, Sir Lionstone dashes off in hot pursuit of an enemy during a mission, leaving the knightling alone. Well, almost alone, because Lionstone also leaves behind his magical talking shield — a hunk of enchanted tech that’s practically as big as the knightling himself. Luckily, its unusual properties, plus one of Sir Lionstone’s gauntlets, let the apprentice wield it. So our fledgling hero heads home to report to the Queen, who turns out to be far more interested in the vault of magical weapons Lionstone stumbled upon than in the fate of the realm’s protector. Thus begins the knightling’s quest to follow in his mentor’s footsteps, rescue his hero, become a knight in his own right and save the day.

It’s a fun setup for a cosy coming-of-age tale, one that also toys with the difference between legend and reality. But it’s a theme the game doesn’t always stick with; the middle stretch in particular feels like the plot vanishes for a while before popping back up again.

A lot of time and love has clearly gone into the animation. It shows in the simple yet highly expressive eyes, and in the way the wiry knightling hefts Lionstone’s massive shield. It’s meant to be ridiculously light, yet the animations sell the opposite — every block or bash looks like a full-body effort. The thing’s practically a barn door to him, and you can almost feel the shadow of Sir Lionstone clinging to it, towering over our naïve little knightling and weighing him down on his journey.

This simple, charming tale unfolds in an action-platformer where you unleash straightforward combos on wildlife and bandits, bounce off mushrooms, and toboggan down hills. There’s the occasional puzzle involving dragging heavy objects or hitting switches, and a dash of RPG found in the shield and ability trees.

No awards for originality will be handed out here, especially since the knightling can hurl the shield like a certain marvellous patriot. But that’s fine — it’s a classic formula and The Knightling has fun with it, throwing in a few quirks of its own. For example, every character’s face is covered. That isn’t just a clever way for the developers to skip facial animations; it’s also neat world-building. What people wear reflects their status, neatly differentiating the peasantry from the royal guard and the richer folk who live atop the city rather than at its base. The muffled nonsense they speak through their masks makes it even funnier when you meet someone without one and they talk clearly.

The Knightling is at its best when you’re platforming. Sir Lionstone’s shield isn’t just a battering ram — you can ride it like a sledge, gaining speed on downhills or sliding across special gloop. Later upgrades turn it into a glider for clearing big gaps. Simply exploring is a lot of fun, helped by the simple, vibrant graphics.

Smacking faces with a shield is something you’ll do plenty of, but combat is easily the weakest part of the game. Again, the animation work sells the idea that the knightling isn’t a full-fledged hero yet and is improvising with a defensive tool. There’s one basic attack, plus the ability to block or parry (with a satisfying blast if you time it right), or dodge out of the way — much to the chagrin of the shield, which loves to sarcastically comment on all the sidestepping. Blocking is almost always the best option, though, because there’s zero penalty for turtling: no chip damage, no stamina drain, nothing.

There’s no manual lock-on, only a soft system running in the background. Sometimes the game won’t let you shift focus to a specific enemy; other times it will randomly switch targets. It’s never unplayable, but it’s consistently irritating.

Another issue is the pace. Heavy animations make sense for a small apprentice lugging a huge shield, but they also make the combat feel sluggish. Enemy attacks tend to be faster than yours, so you’ll often start a swing and get punched in the face halfway through. Dodging or blocking doesn’t always cancel your animation either, which makes the problem worse.

Armour stripping is another neat but clumsy idea. Dish out enough damage and a foe drops to their knees; you can then dismantle their armour by grabbing it and inputting a sequence of button presses. But the prompts are small, the sequence can take a few seconds, and enemies can still attack and break you out of the animation. The game tries to mitigate this by keeping other enemies grounded for a while, but it still feels awkward.

By the time the final third rolled around my interest was faltering. The raw charm couldn’t quite offset the fact that this chunk takes place in a bland, greyish environment peppered with massive cannons that bombard you unless you spend time disabling them. Combat by this point was something I was actively avoiding, especially since enemies now soaked up damage like a Scotsman soaks up pints. Only the platforming — and a desire to see how the story would end — kept me going.

In Conclusion…


Rating: 3 out of 5.

Like its tiny hero lugging a giant shield, The Knightling carries a lot of promise. Its vibrant platforming and playful worldbuilding shine, but slow combat, pacing stumbles and a drab final act weigh it down. It never quite becomes the legend it wants to be, but it’s still an earnest, endearing adventure worth a look if you’re more into hopping and gliding than hammering foes.


Source link

Gearbox tries to prove to Borderlands 4 players that the game is optimised, actually, but just shows it’s a load of Claptrap

0
Gearbox tries to prove to Borderlands 4 players that the game is optimised, actually, but just shows it’s a load of Claptrap


Borderlands 4 is getting lambasted everywhere online for just how poorly it performs for many players on PC. It’s all anyone is talking about in the game’s Steam reviews and elsewhere.

The debacle has certainly given the game a certain image, and developer Gearbox clearly isn’t happy with this current state of affairs. Unfortunately, the developer has decided to respond to the complaints in a strange way that ends up actually undermining its point.

Manage cookie settings

The saga of Borderlands 4’s performance troubles on PC is a very common one. It’s a modern AAA game that performs worse than you expect it to given the hardware it’s running on. In this case, too, the visuals aren’t impressive enough to warrant how heavy the game is.

Borderlands 4 also runs on Unreal Engine 5, which has itself become something of a punching bag. Anytime a game that uses it runs into technical issues, players are quick to blame the engine. Add Denuvo DRM to the mix and the game really has the full package.

Gearbox’s solution to all that negative feedback – which includes many hours of content from top tech YouTubers – was to release ideal settings for some of the most popular Nvidia and AMD GPUs on the market, which it suggests players use.

There are two massive guides – one for each GPU brand – that list every single in-game setting, and the recommended value for each for 1080p, 1440p, and 4K. It’s a bit of an overkill, considering the initial settings released for Borderlands 4 ahead of its launch were nowhere near as detailed. These updated guides, on the other hand, offer framerate targets, resolution, and whether or not upscaling is required to achieve each one.

Borderlands 4 vehicle press image
Image credit: 2K / Gearbox

Unfortunately, as detailed as they may be, the two lists only serve to prove players’ points that Borderlands 4 simply isn’t optimised well enough to take advantage of the hardware it’s running on. The reason is that upscaling is required for almost every single one.

In fact, for most of the higher-end GPUs, achieving a framerate beyond 60fps requires frame generation, which the two guides clearly state. Frame generation, if you’re unfamiliar, is similar to motion smoothing, in that it interpolates the frame buffer to add more virtual frames, increasing input lag.

Frame generation is also generally recommended for players who can already reach above 60fps comfortably, as its drawbacks become much more serious when your hardware/settings combination can’t reliably achieve 60fps without it.

The guides only really serve to shift the blame onto players, who are clearly advised to temper their expectations (and their settings), not to mention rely on frame generation to achieve acceptable results regardless of how powerful their GPUs are.


Source link

Zak McDrucken Saves The Chickens – Another impressive ZX Spectrum game appears, and this one is by RetroSouls

0
Zak McDrucken Saves The Chickens – Another impressive ZX Spectrum game appears, and this one is by RetroSouls


Here we are with another rather impressive looking homebrew, and it’s ‘Zak McDruken Saves The Chickens’ from RetroSouls Team for the ZX Spectrum. A game that not only has fantastic graphics while also having a clever use of color attributes, but it’s also very enjoyable while also remaining a challenge as you try to solve some of the puzzles throughout each of the many levels. Certainly a game that’s worthy of a feature, both on this website, and throughout twitter(x).

While there is very little to go on from the website, Gentlemen’s Pixel Club (YT) who also did a video linked here, couldn’t have said it any better. “This isn’t just nostalgia – it’s brand-new 8-bit gaming in 2025! RetroSouls are back at it again, proving the Spectrum isn’t just alive – it’s still clucking. Expect quirky puzzles, retro charm, and plenty of 🐔 chaos as Zak McDrunken does his best to save the day (and the chickens). Whether you’re running this on real hardware, emulators, or a MiSTer FPGA, you’re in for a treat. From tricky level design to laugh-out-loud moments, this is one indie retro release you don’t want to miss”.


Source link

Forget Nintendo, My Arcade Atari Gamestation Go With 200+ Retro Video Games Including Pac-Man Is Now Up for Preorder on Amazon – Kotaku

0
Forget Nintendo, My Arcade Atari Gamestation Go With 200+ Retro Video Games Including Pac-Man Is Now Up for Preorder on Amazon – Kotaku


My Arcade has produced a number of miniature retro arcade cabinets supporting officially-licensed games from developers like Capcom and Sega. But now, they’ve just launched an Atari gaming handheld, the Gamestation Go, that just looks beautiful. Pre-orders have opened up earlier this week. You can head on over to Amazon to reserve yours at a price of $180.

See at Amazon

200+ Video Games

The library is impressively stacked. Over 200 video games from yester-year, spanning the Atari 2600, Atari 5200, and Atari 7800 along with Atari Arcade as well as Jaleco and PIKO platforms. Play titles like Breakout, PAC-MAN, Balls of Steel, Missile Command, Centipede, and Asteroids. They all come pre-loaded, no download necessary. It does state is has built-in Wi-Fi for easy updates, but it’s unclear if that could mean more games added at some point in the future.

Design-wise the Atari Gamestation Go looks similar to a Nintendo Switch at a glance, with controller inputs along the side of a big 7-inch display. Also, like a Nintendo Switch, you can play its games on your TV. No dock required. Just a simple HDMI cable will allow you to put these classic titles on the big screen. You’ll probably want one with some decent length though as you’ll still be using the Atari handheld as the controller. It’s battery life will grant you about four to five hours of playtime on a single charge.

The original Atari consoles were well before we established the quintessential layout and design of modern video game controllers. My Arcade’s Atari handheld looks backward to the weird oddities of these old controllers, implementing multiple options like a trak-ball and numeric keypad. You can play these Atari titles authentically to these quirky inputs you just don’t see any more.

There are also all the modern conveniences like an analog stick, D-pad, bumpers and classic A-B-X-Y gamepad buttons (Notably in Xbox’s layout with the A button at the bottom). The various buttons, sticks, and other inputs are all illuminated with SmartGlow technology to both see the inputs in the dark and, more importantly, look cool.

The price point or $180 is a little rough. That’s more than half the cost of a Nintendo Switch for a console that just plays games from the 80s that are pretty easy to get your hands on for next to nothing elsewhere. This seems like a collector novelty more than anything, but definitely a cool thing to pick up if you want to escape skill trees and battle passes for awhile.

The Atari Gamestation Go is available to pre-order at Amazon and is set to release October 31 of this year.

See at Amazon


Source link

New Game Pass Additions and a Last Call for Fan-Favourites | TheXboxHub

0
New Game Pass Additions and a Last Call for Fan-Favourites | TheXboxHub


game pass logo
Mid-September changes to Game Pass

The Game Pass library is constantly in motion, and this week brings a fresh wave of changes. While we welcome a unique new simulation experience to the service, it’s also time to say a fond farewell to a few fan-favourite titles.

Let’s dive into all the latest updates hitting the Game Pass lineup.

As always, there are new adventures landing on Game Pass this week. Although, in fact, it is a singular new adventure, with the addition of just one new game. Alongside that, three shift out to make space going forward.

RoadCraft (Cloud and Xbox Series X|S) – September 16th

Get ready to get your hands dirty with RoadCraft, an advanced simulation game that puts you in charge of a disaster recovery company.

Your mission is to reshape devastated areas and restore local industries by clearing debris, rebuilding damaged roads and bridges, and much more. This is an advanced physics simulation where you’ll operate over 40 different vehicles, from bulldozers to construction cranes, to clear and rebuild.

You can take on this challenge alone or in co-op with up to four players, working together to overcome the aftermath of natural disasters. You’ll need to carefully plot routes for your transport trucks, manipulate elements like sand and asphalt, and recycle every piece of debris into reconstruction material.

Final Call: Games Leaving Game Pass on September 15th

As new games arrive, it’s time to bid a fond farewell to a few fantastic titles that are departing the service. This is your last chance to experience these games before they’re gone!

All You Need is Help (Cloud, Console, and PC)

This innovative co-op puzzle game from the creators of PixelJunk is all about teamwork. It requires adorable, fluffy cube-shaped creatures to work together to solve challenges and reach their goals.

All You Need is Help is designed for four players, with its simple controls and quirky voice features making it a fun and accessible experience for all ages.

Wargroove 2 (Cloud, Console, and PC)

Fans of turn-based strategy games, take note!

Wargroove 2 offers a deep and engaging experience strongly reminiscent of the Advance Wars series. With its wealth of content, new campaigns, and a host of new characters, it’s a game that offers a lot of fun.

As our 4.5/5 review noted, “Wargroove 2 strongly reminds of Advance Wars, and that is as good a recommendation as you can get. If you need more, can I point you to the amount of content included and the fact that it is great fun to play. If you like a strategy game, Wargroove 2 is an easy sell, but even if you’re new to the scene, I urge you to have a go.“

We Love Katamari Reroll+ Royal Reverie (Cloud, Console, and PC)

Get ready to roll!

We Love Katamari Reroll+ Royal Reverie is a charming and addictive puzzle game where you play as the Prince, tasked with rolling up everything in your path to create a giant star. This updated version of the classic game features new content, including challenges where you play as the King in his youth.

Our 4/5 review found it to be a delight, stating, “We Love Katamari REROLL + Royal Reverie doesn’t add much more that Katamari Damacy REROLL hadn’t already added… But you really shouldn’t sidestep it either, as more of the same is ‘super-dooper’, as the King of the Cosmos would say, since the same is so instantly charming.“

With the arrival of RoadCraft (download it from the Xbox Store) and the departure of these three fan-favourites, the Game Pass library is once again in flux. Be sure to jump into the new addition and give a proper send-off to the departing titles before it’s too late!


Source link

Tetris 1200 (AGA) – The 1988 Arcade version of Tetris for the Commodore Amiga [1.02 UPDATE]

0
Tetris 1200 (AGA) – The 1988 Arcade version of Tetris for the Commodore Amiga [1.02 UPDATE]


If you remember the 1980’s hit game of Tetris then you’ll be pleased to know that as of this morning, we have been informed that JOTD has released an update to the 1988 Arcade version of Tetris for the Commodore Amiga 1200. As in the words of the creator “A transcode of Atari Tetris arcade version for 68020/AGA amiga, music is kind of emulated, missing some drums & sfx but it’s still really good!”. To coincide with this news, not only can you play this rather decent looking port via itch io, but Saberman has also provided some new gameplay footage too.

Here’s what JOTD said about why he created this version for the Amiga, back when it was first announced (Skip this part if you’ve already read it before). “I consider Tetris Arcade version by Atari the best Tetris version around. It’s colored and the music is great. The game used a 6502 CPU and not a Z80. I wrote a converting source tool for 6502 to 68000 as well. Thanks to MAME I could workaround the nasty protection (constant bank switching caused by “slapstic” chip) and unlike my other ports, the project is more a fast emulator than a re-coding. It requires AGA because the original game has 16 banks of 16 colors and a 256 color palette which is – added – dynamic. So ECS port would be quite tricky without rewriting the whole game”.

UPDATE : While the game was released over a year ago, the newest 1.02 version however is listed with the following changes.

sounds are less noisyAlso should be slightly faster due to optimizations

Links :1) Source


Source link

Popular Posts

My Favorites